Archive | Wheat Free RSS feed for this section

#BetterGoodThings “Waste Not” Edition: Coffee Pudding

5 Jul Coffee Pudding

Coffee Pudding

When Evin (my Better Good Things buddy) and I first bonded via the interwebs it was over an instagram image I had posted of espresso powder while I was in my Mono fueled spiral of exhaustion.  It seemed that Evin and were both simultaneously contemplating ways to inject copious amounts of caffeine into our systems as a motherhood survival tactic.  Since I had been sans-caffeine for several years until my bout with mono, Evin and a few other insta-buddies became my espresso powder spirit guides.  So it was inevitable that espresso powder would one day be the heart of one of our Better Good Things Challenges.

A little disclaimer about this post:  Remember my April BGT post in which Evin was running a bit behind and didn’t have her link up when I posted?  Yeah…. so this was our MAY post that I started writing in APRIL after a race and I’m just now posting it in JULY.  Apparently, I’m the slacker in this pairing.  I would have never know that about myself had I never started a public facing blog that makes my sporadic task neglect so glaringly…. public.

Oh well… what I lack in perfection I make up for in hospitality and charm.  {bats eyelashes adorably}

I’m totally in love with this recipe because it was born from my interest to eliminate waste in our home!  After the final Chuy’s Hot to Trot 5k, The Hubs and I hosted some of our running buddies for breakfast, beer, and coffee…. lots and lots of coffee.  I’ve learned recently that there is very little change of having too much coffee on hand for people after a run, so we made sure we had LOTS of coffee.  As a coffee press family, having lots of coffee on hand necessitates a trip to Starbucks.

Coffee Pudding

Because we have to call in reinforcements for copious amounts of caffeine, having lots of coffee also meant that we also had lots and lots of coffee accoutrements provided by the good people at Starbucks with each carafe. One our gusts have left to go home and nap off thier impressive 5k times, we were left with tons of leftover half and half and sugar.  Knowing that Evin and I had an espresso powder challenge planned I felt inspired to put the Starbucks leftovers to good use.

And this recipe was seriously crafted with the leftovers.

Coffee Pudding

This is exactly how much sugar they gave me…

Coffee Pudding

And this is exactly how much half and half they gave me…

Coffee Pudding

…so that is exactly what I used!

I added in a little cornstarch, salt, and espresso powder (of course) and all of a sudden I had pudding all thanks to Starbuck’s overly-generous provisions!  I let them set in my adorable Le Cruset coffee cups and all of a sudden I had an elevated desert that totally betrayed its leftover status.

When Monday morning rolled around, I served it too my soul mama buddy who brings her little girl over for a standing playdate.  She bartends the night before so I always have an espresso ready for her when she arrives.  She quickly declared this deceptively simple pudding far superior to her regular Monday morning espresso.  Nothing like a little sugar, cream, and espresso to get you ready for toddler princess playtime.

Coffee Pudding


“Waste Not” Coffee Pudding

  • 2 cups half and half
  • 1/2 cup minus 1 tbs granulated sugar
  • 1 1/2 tbs espresso powder
  • 1/4 tsp salt
  • 3 tbs cornstarch

Directions: In a small bowl, combine 1/2 cup of the half and half with the cornstarch whisking as you add the cornstarch to prevent clumping.

Combine remaining half and half, sugar, salt, and espresso powder in a saucepan and slowly bring to a boil, whisking frequently to prevent scalding.  Remove from heat.

Whisk in cornstarch mixture and return to heat, continuing to whisk constantly to prevent clumping as pudding thickens.  When whisk leaves visible ribbons in the pudding, remove from heat and pour into coffee cups.

Cover the surface of each pudding with plastic wrap to prevent skin from forming and refrigerate until ready to serve.


Evin made Honey Espresso Skin brightener- check it out!

Watermelon Salad with Avocado, Feta, Mint and Pomegranate Dressing

2 Jun Watermelon Salad with Avocado, Feta, Mint and Pomegranate Dressing

Whew!  The blog has been silent for quite sometime, but I have a good excuse…

We packed up Baby Bird for her first international jaunt to Paris and Ireland (Yes, I realize that it sound weird to list a city and then a country as separate destinations, but I figured it was easer than listing every town we visited in Ireland!) where we all ate entirely too much bread and cheese for 15 days.  But we ran it off…

The Hubs on a morning Paris run

The Hubs on a morning Paris run

The Hubs completely dominating The Cliffs of Moher

The Hubs completely dominating The Cliffs of Moher

International travel even has a way of making ME look like a competent runner

A little run through The Burren- International travel even has a way of making ME look like a competent runner

So I guess we sort of had baguette immunity since we were running.  That’s a thing, right?

We’ve only been home a few days- we are currently struggling to get a toddler back on the correct time zone… YIKES!- and I’m trying to keep things simple, so when we got an invite to a friends house for dinner* I went with my very favorite, super simple summer combo of watermelon and feta for our addition to the fete.  Just to be fancy, I jazzed it up with avocado, mint, and a pomegranate simple syrup that were still all very easy but felt slightly elevated.

To be clear, this is the salad that will accompany me to all gatherings in the next few months.  So if you invite us over, don’t you add this to your menu and then expect me to arrive with a berry crostada embellished to look like the American flag.  You’ve been warned!

Okay, okay… if you ask really nicely, I’ll still show up with a patriotic dessert.

But you better have plenty of watermelon salad!


*If you invite people over for dinner after they’ve been out of town with a toddler for awhile, you are totally awesome.  Chances are anyone traveling with kids is exhausted and looking for any excuse to not have to cook a meal at home… and then clean it up!

Watermelon Salad with Avocado, Feta, Mint and Pomegranate Dressing

Watermelon Salad with Avocado, Feta, Mint, and Pomegranate Dressing

  • about 1 lb watermelon, cut into 1/2 inch cubes
  • 2 avocados, cubed
  • 6 oz solid feta, cut into 1/4 inch cubes
  • 2 sprigs of fresh mint
  • 1 cup unsweetened, pure pomegranate juice
  • 1/4 cup organic sugar
  • 1/4 cup maple syrup

In a small saucepan, bring pomegranate juice, sugar, and maple syrup to a simmer and reduce to form a thin simple syrup.  Set aside in a container to cool.

Layer watermelon, avocado, and feta in a large serving bowl.

Pick the mint leaves from the springs and chiffonade.  Sprinkle leaves across the top of the feta layer.

Serve with dressing on the side (the most attractive presentation) or toss with simple syrup dressing just before serving.


Beef and Quinoa Taco Bowl with The Mother of All Taco Seasoning

25 Mar The Mother of All Homemade Taco Seasoning

Beef and Quinoa Taco Bowl- Perfect for endurance athletes!

Here we are y’all… a month past Austin Marathon and I’m still avoiding writing about it.  I’ll get there, but there are so many other things going one and the fact that it doesn’t really count as a race because I basically strolled through the second half makes it feel pretty unnecessary to even recap.  Besides, I’m SO BEHIND on recipes right now it seems the recap will have to be squeezed in amidst far more interesting and yummy topics.

And, since I’ve currently got a backlog of recipes half written and ready to post, this is the perfect time to delay them further to write about what I’m making a this very moment in my kitchen.  Obviously, that makes perfect sense!

Boston Marathon is just a month away, so logically The Hubs is facing an achilles injury with less than four weeks before he has to line up in Hopkinton.  No bueno!  Luckily, we’ve got a little time and a lot of awesome resources so we aren’t concerned.   Who needs long road runs when you’ve got access to an AlterG and 3 hour aqua jogs (in a 25 meter pool none the less… The Hubs has deemed it the “actual insanity workout”)?  Dedication and hard work trump perfect circumstances every time, mostly because perfect circumstances don’t exist.

What does this have to do with food?  Major changes in training intensity this close to a race coupled with an injury mean we need to keep a careful eye on his weight and nutrition- even more than usual.  Every calorie has to count big time in terms of nutrient density.  Which means bye bye to refined carbs and the sugary treats that he loves to sneak!  I have to make sure he is satisfied and nourished enough that he doesn’t have the desire to snag a candy treat when I’m not around.

It also means making dinners that can be packed up as lunches for the next day because I’ve got my hands full at night ensuring I pack the right combination of snacks to keep him full… but not too full.

Last week, I brought a tray of my made-over mac and cheese to my friend Laura’s house for a lunch playdate, and she served me a quinoa side dish very similar to the one I feature here that I promptly mixed in with my serving of mac- and it was delicious.  I quickly realized that the concept of her quinoa side dish would be a versatile one that I could draw on for years to come.  As I made my menu plan for the coming week, the memory of that little quinoa side kept shouting at me in my brain “Top me with ground beef and serve me over salad!”

If you’re a distance runner or endurance athlete, you’re probably pretty familiar with skillet style meals- brown some meat, dump in beans and tomatoes, and serve over rice.  While easy, I’m not a huge fan because skillet meals lack texture or color interest- they are meals of necessity and not enjoyment.  This beef and quinoa taco bowl is just as easy, but far more flavorful and offers levels of interest for your eyes and your palate.

I make my own taco seasoning, and you should too.  Mine is spicier and smokier than the one my friend Laura makes and serves mixed straight into the quinoa , but that’s the beauty of making your own spice mixes- you can make them perfectly to your liking.  I served the beef and quinoa over mixed baby herb greens, but you can just as easily use it to stuff an tomato, a pepper, or an avocado… or wrap it up in a spelt tortilla.  Top it according to your nutritional needs and taste preferences- plain kefir (instead of sour cream), queso fresco, or diced avocado.

The Mother of All Homemade Taco Seasoning

Homemade Taco Seasoning

  • 2 tbs chipotle chili powder
  • 1 tsp smoked sweet paprika
  • 1 tsp garlic powder
  • 2 tsp ground cumin
  • 1 tsp oregano
  • 1 tsp organic sugar
  • 1 tsp Chihuahua de Mexico wood smoked salt
  • 1/2 tsp smoked tomato powder

Directions: Mix all spices in bowl to combine.  Store in an airtight container.

Beef and Quinoa Taco Bowl- Perfect for endurance athletes!

Beef and Quinoa Taco Bowl

  • 1 cup quinoa
  • 2 cups water or veggie broth
  • 2 cloves garlic
  • 2 tbs+ of homemade taco seasoning
  • 1 lime
  • 1 cup frozen corn kernels, thawed
  • 1 cup cherry tomatoes, diced
  • 1/4 cup packed cilantro leaves, finely chopped
  • 1/4 a small red onion, finely diced
  • 1 lb grassfed, lean ground beef
  • grapeseed oil
  • serving options: plain kefir, queso fresco, mixed baby greens, avocado

Directions: Rinse quinoa well and drain thoroughly.  Bring veggie broth or water to a boil in a small saucepan.  Add quinoa and I smashed garlic clove to the broth.  Cover, reduce heat, and simmer for 15-20 minutes until most of liquid is absorbed.  Remove from heat, uncover and fluff with a fork.

Thinly slice remaining garlic clove. Saute sliced garlic in a dollop of grapeseed oil for 2 minutes until fragrant but not browned.  Over medium/medium-high heat, add ground beef  and break up into large pieces.  Add taco seasoning (add seasoning to taste, I like to start with 2 tbs) and cook through, breaking up into small pieces as you cook.  If desired, season with additional salt while browning meat.

Line a colander with paper towels and pour in ground beef to drain off/ absorb any unnecessary fat.

In a large bowl, toss together quinoa, corn, onion, tomatoes, and cilantro.  Squeeze lime juice into quinoa mixture and toss to mix thoroughly.

Serve quinoa on a bed of greens, topped with beef and additional toppings of your choice.


Homemade Gummy Hearts

26 Jan Homemade Gummy Hearts- sugar free and packed with fresh fruit from Go Running, Mama!

Homemade Gummy Hearts- sugar free and packed with fresh fruit from Go Running, Mama!

We’ve got a toddler in the household, so our home runs on the currency of stickers, kale chips, and fruit snacks.  The Hubs hates stickers.  They end up on everything and are a beast to peel off of the tile after he unknowingly grinds them in place on the way out the door for his 5 am run.  I have fingernails, so stickers aren’t my adversary.  I, on the other hand, am opposed to fruit snacks.  Even the organic, naturally flavored ones are just concentrated nuggets of sugar- and that’s not even visiting the food dyes and preservatives in  the supermarket variety.  (Why are these things called “fruit snacks” anyways?  Let’s be real.  Actual fruit- fresh or dried- should be called “fruit snacks” and everything else should be correctly labeled as gummy treats.)  But Baby Bird love both stickers and fruits snacks, so there aren’t getting eliminated- we just needed to find a way to make them better!  Happily, I discovered this homemade gummy bear recipe from Taralyn over at Undressed Skeleton and was eager to give it a try.

Since Baby Bird loves Valentine’s Day and we are on a heart shaped treats kick at our house (check out our amazingly healthy heart shaped cherry kale pops), I though it would be fun to make little gummy hearts that we could also use as better snacking options to give to friends in place of the go-to red dye 40 laden store bought treats (I’ve totally got my good friend Evin and her struggles with food dyes on the mind).  We stayed pretty true to Taralyn’s recipe and the results were fabulous- sugar free gummy treats packed with fresh fruit!

We had lots of great local citrus on hand thanks to our CSA box, and it was nice to intimately know the source of our ingredients!  We had lots of oranges, Meyer lemons, and lovely key limes so I opted for a citrus medley for the strawberry snacks (1/2 cup orange juice, 1/4 cup key lime, 1/4 Meyer lemon) that would be delightfully tart next to the banana snacks (made with a bit of orange juice) with would naturally be very sweet.

Homemade Gummy Hearts- sugar free and packed with fresh fruit from Go Running, Mama!

The process is insanely simple- simmer the fruit, juice, and -in the case of the strawberry snacks- local honey until very soft.  We opted for local honey in place of the stevia in Taralyn’s recipe for two reasons: a) anything to help with Cedar Fever in the ATX, and b) the jury is still out on stevia in this household.

The simmer process was slightly longer with the strawberries than the bananas, of course.

Homemade Gummy Hearts- sugar free and packed with fresh fruit from Go Running, Mama!

Once the fruit is softened, you pop the mixture into a blender and puree until smooth.  Remove the blender cap to allow the mixture to cool slightly and then add the gelatin and process in the blender once again.

Homemade Gummy Hearts- sugar free and packed with fresh fruit from Go Running, Mama!

Pour the mixture into a pan and pop into the fridge to cool for an hour.  The size of the pan you use for cooling with dictate the width of your gummy treats.  I didn’t want ours to turn out too thin, so I chose containers that would give us thicker treats.  The strawberry recipe also makes roughly double the treats of the banana which I feel is an ideal balance of tart to sweet when tossed together!  Baby Bird strongly prefers the strawberry citrus flavor as she tends to enjoy more complex flavor profiles in her foods.

Homemade Gummy Hearts- sugar free and packed with fresh fruit from Go Running, Mama!

For nice tiny hearts, I used a fondant cutter to cut our shapes.  Once you cut the shape, you have to give it a little jiggle to detach it from the bottom of the pan and it will lift up easily as you remove the cutter.

Homemade Gummy Hearts- sugar free and packed with fresh fruit from Go Running, Mama!

Needless to say, they were a huge it!  It was tough to snatch pictures of them before they disappeared.  Baby Bird figured I had momentarily lost my mind because I was allowing fruit snack consumption without even the slightest frown on my face and she was determined to exploit what she assumed was a lapse in judgement as long as possible.

The simmer process was slightly longer with the strawberries than the bananas, of course.

The texture is nice a firm- far more similar to an actual gummy bear than a jello jiggler- which is awesome.  Before we tried these, I was a little afraid that they would be more like amped up jigglers.  They have also given me high hopes that I can tweak this recipe to make homemade energy gels for our long runs.  Heck, if I can figure that out I may be able to add another distance race to my schedule from all the savings!

Now if I can only figure out how to make homemade stickers that don’t require Mommy’s nails or a putty knife to remove them from the tile…

Homemade Gummy Hearts- sugar free and packed with fresh fruit from Go Running, Mama!

Strawberry Citrus Gummy Hearts

Ingredients

  • 1 cup fresh citrus juice (at least 1/2 cup orange juice + additional citrus juice of your choosing to create 1 cup)
  • 2 cups diced strawberries
  • 1 tbs local honey
  • 5 packets of unflavored gelatin

Directions: Combine juice, fruit, and honey in a small pan and bring to a simmer.  Simmer until strawberries are very soft.

Pour mixture into blender and puree until smooth.  Remove lid from blender and allow to cool for 5 minutes.  Once slightly cooled, add gelatin packets and process in blender once more.

Pour into a pan (the size of the pan you select with affect the thickness of your gummy treats- I chose 8×8) and place in fridge to set for at least one hour.

Remove from refrigerator and cut into shapes.

Makes 200+ gummy hearts (will vary based on size of pan and size of shapes)

Banana Gummy Hearts

Ingredients

  • 2 ripe bananas
  • 1/4 cup freshly squeezed orange juice
  • 2 packets of unflavored gelatin

Directions:

Combine juice and banana in a small bowl.  Mash banana with a fork and stir to combine with juice.  Add mixture to a small pan to simmer for 3-5 minutes until banana is very soft and slightly golden in color.

Pour mixture into blender and puree until smooth.  Remove lid from blender and allow to cool for 5 minutes.  Once slightly cooled, add gelatin packets and process in blender once more.

Pour into a pan (the size of the pan you select with affect the thickness of your gummy treats- I chose 8×8) and place in fridge to set for at least one hour.

Remove from refrigerator and cut into shapes.

Makes 75+ gummy hearts (will vary based on size of pan and size of shapes)

*These can easily be toted as lunch bag or diaper bag snacks, but since these are made with fresh fruit and no preservatives, store in the fridge until you pack them up to send as a treat.

Breakfast on the Run: Baked Egg Cups To Go

15 Jan

The The Hub’s new Team Rogue schedule is a bit of a game changer in our household (not just because they’ve lead him to finally accepting that he has insanely loud feet).  He’s now out the door for the day pre-workout instead of our old routine in which he ran the neighborhood/area, came home to eat breakfast and get ready for work, and then left for the day.  Because it was routine, I found this slightly easier in my mind because the dirty laundry made it in the bathroom immediately and I could worry with his morning nutrition on the spot.  In reality, I’m realizing that it made me less strategic- and also meant The Hubs often made his own eggs while balancing a business call if and when I managed a morning run for myself.  We’re multi-taskers ’round here, y’all!

I’m realizing that pre-prepped breakfast to go is a thing of beauty.  It forces me to be strategic and also means I don’t feel like a lazy bum on the mornings that I sleep in a bit later than I meant… because I was up later than intended… because I took extra time to stop and smell the roses with the little one during the day… (You see the cycle right?)

Last week I created Mango Recovery Muffins for The Hubs to tote along for breakfast and this week I’ve added baked egg cups into the mix.  They are easy enough that you could bake them the morning of if you prefer, but I’m streamlining our morning shenanigans (read as: I’m not waking up at 4:15 am for someone’s track practice until it’s because I have to get up to drive Baby Bird to the track) so I’m baking them the night before and packaging them up neatly for the next morning.

Breakfast on the Run: Bake Egg Cups, fruit skewers, Mango Macadamia Recovery Muffins, and Raspberry Refrigerator Jam from Go Running, Mama!

As you can see- via the beauty that is my late night Instagram snapshot- The Hubs left this morning with two baked egg cups, fruit skewers, a Mango Macadamia Recovery Muffin, and a generous scoop of raspberry chia refrigerator jam.  The kiwi blueberry skewers made it easy for him to eat his fruit quickly without having to use utensils or picking up each piece with his fingers.  A little box of balanced, satisfying, premade nutrition designed for him to consume quickly in the transition from workout to work.

Now that is a productive start to the day!

Baked Egg Cups To Go

Ingredients

  • 2-4 jumbo eggs
  • i slice of thick cut bacon; cooked, fattiest part removed, and diced
  • truffle salt
  • butcher’s cut pepper
  • olive oil

Directions: Preheat the oven to 350 degrees F.

“Grease” silicone muffin cups with olive oil.  Place muffin cups on a baking pan or sheet.

Crack an egg into each muffin cup.  Sprinkle each egg with diced bacon, truffle salt, and pepper.

Place baking sheet and muffin cups in oven and bake for 16-19 minutes, rotating pan each 6 minutes.  Remove when eggs are white and yolks still have a slight wobble.

Quinoa Bowl with Black Beans and Grapefruit

13 Jan Quinoa Bowl with Black Beans, Grapefruit, Avocado and Kefir- Go Running, Mama!

Last week I intended to post about my goals for this year.  Actually, I planned to post within a few day of my recap of last year’s goals but I just hadn’t seemed to settle on measurable parameters quickly enough to do so.  Then I meant to get them typed up this weekend.  And again today…

Maybe one of my goals should actually be typing up and airing my goals?

In reality, two of my very huge goals for this year are putting my family (That include ME!  I’m a part of that family so my needs are going to become more important too!) ahead of everything else and being honest with myself about each day’s “must do’s” as opposed “like to do’s.”  Guess where my goals blog post falls?

What was a “must do” today were some household responsibilities and then allowing Roomba to do my vacuuming while I enjoyed some crafting and  outdoor time with Austin’s most natural gardener.

Go Running, Mama!

Seriously.  That adorable little one wins every time.  And I’m not allowing unnecessary responsibilities to make me feel bad about that anymore.

And, of course, dinner was on that “must do” list as well.  After a day of play and a later than expected work evening for The Hubs it really became a “must do quick” sort of task.  So I kept it quick and dirty easy and healthy.

Quinoa, kefir sauce, black beans, mashed avocados, and grapefruit… in a pretty little pile on a plate. Done and done.

And now I’m off… because sleep is topping my “must do” list right now!

Bonsoir!

Quinoa Bowl with Black Beans, Grapefruit, Avocado and Kefir- Go Running, Mama!

Quinoa Bowl with Black Beans and Grapefruit

Ingredients

  • 1 cup quinoa
  • 2 cups vegetable broth
  • 1 can Eden Organics BPA free black beans
  • 2 grapefruit
  • 2 avocados
  • 2 limes
  • 1/2 yellow bell pepper, diced
  • 1 cup plain kefir
  • 1/3 cup chopped cilantro leaves
  • 1/3 cup green onions, diced
  • 1 jalapeno, sliced (optional)
  • salt
  • pepper

Directions

Rinse the quinoa well in a strainer until water runs clear.  Add to a sauces pan with vegetable broth and  bring to a boil.  Reduce heat, cover, and simmer for 15 minutes.  Remove from heat, uncover, and fluff with a fork.  Set quinoa aside to cool.

Drain and rinse black beans.

In a small bowl, mash avocados with a fork.  Add juice from one lime, diced yellow bell pepper and salt to taste.  Set aside.

In another small bowl mix kefir, juice from one lime, cilantro, green onion, and salt to taste. Set aside.

Cut the pith and peel from the grapefruits.  Using a paring knife, remove each grapefruit section.

To serve, assemble ingredients in a bowl- quinoa, kefir sauce, black beans, guacamole, and grapefruit sections.

If storing, keep ingredients separate and assemble when serving.

Gifts from the Heart: Baking Soda Clay Ornaments

17 Dec Gifts from the Heart: Smooth Baking Soda Ornaments (A homemade alternative to going to the ceramics studio)- Go Running, Mama!

Gifts from the Heart: Smooth Baking Soda Ornaments (A homemade alternative to going to the ceramics studio)- Go Running, Mama!

Looking for even more ornament ideas?  Check out our Salt Dough Ornaments and Cinnamon Clay Ornaments!

I’m pretty close to breathing a a sigh of relief because we’ve almost completed all of our homemade gifts for this year.  I grew up with a mom who could command salt dough to do some pretty spectacular things, so that’s what we’ve used for our homemade ornaments in the past.  There are a couple of challenges with salt dough though- it takes forever to dry completely so you can paint and varnish and the surface isn’t completely smooth which gives it an adorable, shabby appearance but makes it hard for a little one to decorate with anything other than a paintbrush.

This year we were getting a later start and we also wanted to get started with our gift ornaments with some other playgroup friends during what Baby Bird referred to as her “ornament play party” so I decided that we would switch to baking soda clay for this year.  Baking soda clay bakes to dry much quicker than salt dough and dries with a perfectly smooth finish- my beautiful friend Kristin who joined us with her son for ornament creation pointed out that they looked and felt exactly like the ornaments available at the ceramics studio she and I have visited with our kiddos in the past.  She is right- they have a smooth, non-porous finish with a light sheen from the baking soda that makes them look special even without decorating.

The best part is they can be decorated with crayons and markers should you choose to keep the paint packed away.  You could even toss a few dried ornaments and markers into a ziplock bag in your purse to tote along for moments when your little one needs a fun activity if you are in a waiting room or stuck in traffic.  Baby Bird and I packed up a few with some markers to deliver to the porch of a friend with a sick kiddo who had been stuck at home for a few days.  There is nothing better than a virtual playdate delivery!

Gifts from the Heart: Smooth Baking Soda Ornaments (A homemade alternative to going to the ceramics studio)- Go Running, Mama!

The night before our “ornament play party” I made a batch of baking soda clay and Baby Bird and I cut lots of fun ornament shapes with our cookie cutters.  I baked them that evening so the kids would have an activity to work on while I made fresh clay for the kiddo’s handprint ornaments.

The precut, baked ornaments were a big hit and kept little hands very busy.  So busy, in fact, that I ended up sending the baking soda clay I made for handprint ornaments home with my mama friends…so I’ve been on the hook to provide step by step instructions for just what to do with that bag of clay I sent home!

Gifts from the Heart: Smooth Baking Soda Ornaments (A homemade alternative to going to the ceramics studio)- Go Running, Mama!

As you can see, Baby Bird is on a monochromatic kick.

This year I decided I’d like to give handprint reindeer and fingerprint Christmas trees since it has been two years since made anything that included Baby Bird’s fingerprints.  Instead of doing relief  handprints for a second year in a row, I opted for cutting a stencil of Bird’s hand to use for the reindeer.

Gifts from the Heart: Smooth Baking Soda Ornaments (A homemade alternative to going to the ceramics studio)- Go Running, Mama!

I moved the cut shapes to a baking sheet lined in parchment and had Baby Bird make little fingerprint indentions on the trees-pinky finger at the top down to thumb at the bottom.  Then into the oven!

Gifts from the Heart: Smooth Baking Soda Ornaments (A homemade alternative to going to the ceramics studio)- Go Running, Mama!

I started with the trees since I knew they would be my most time consuming project.  I’ve discovered that things turn out better when you paint the edges of your ornaments first.  Otherwise, you end up with a slightly noticeable border on the face of your ornament.

Gifts from the Heart: Smooth Baking Soda Ornaments (A homemade alternative to going to the ceramics studio)- Go Running, Mama!

Once the trees were painted and dry, I primed the fingerprint reliefs with white paint I applied wit a cotton swab so that Baby Bird’s fingerprints would really stand out.

Gifts from the Heart: Smooth Baking Soda Ornaments (A homemade alternative to going to the ceramics studio)- Go Running, Mama!

I let Baby Bird select the colors we would use for each fingerprint and made sure we had wipes close at hand before we started adding colored fingerprints to the tree.  Two things to know- 1) there WILL be mess when you paint on a toddler hand so prepare for it and 2) you have to work at the speed of light to ensure your tiny artist doesn’t grow weary of the project in the middle!  So be prepared.

Gifts from the Heart: Smooth Baking Soda Ornaments (A homemade alternative to going to the ceramics studio)- Go Running, Mama!

We worked finger by finger down the trees- we first did all the pinky finger marks on our trees and worked out way down… much easier that doing each tree separately.  Though it took considerable guiding to ensure Baby Bird’s prints made it in each proper place, she had a blast yelling “Smooosh” each time she squished her finger into the indention and left a print.  Oh, how that girl loves to smoosh.

Gifts from the Heart: Smooth Baking Soda Ornaments (A homemade alternative to going to the ceramics studio)- Go Running, Mama!

When I decided on fingerprint trees, I hadn’t quite decided if the fingerprints should represent ornaments or lights.  Once all the color had been applied, the fingerprinted trees looked adorable but they just didn’t feel complete…

Gifts from the Heart: Smooth Baking Soda Ornaments (A homemade alternative to going to the ceramics studio)- Go Running, Mama!

So I added a “string” to make fingerprint lights which felt much better!

Once they were dry, I hung them from a drying rack outside and sprayed them with a coat of low gloss acrylic sealer.

Gifts from the Heart: Smooth Baking Soda Ornaments (A homemade alternative to going to the ceramics studio)- Go Running, Mama!

While the trees dried, I move on to the reindeer handprints which were insanely simple by comparison.

Paint the handprints brown.

Seriously.  That’s it.

Gifts from the Heart: Smooth Baking Soda Ornaments (A homemade alternative to going to the ceramics studio)- Go Running, Mama!

Once the paint is dry, spray them with a sealer and apply eyes, a nose, and a bow.

Done.  Wham, bam, Happy Holidays Ma’am!

Gifts from the Heart: Smooth Baking Soda Ornaments (A homemade alternative to going to the ceramics studio)- Go Running, Mama!

I love that they feel totally different from the Santas and Penguins with gave as gifts last year, but are every bit as homespun and heartfelt!  Between these, the cinnamon clay ornaments, and the reindeer tea towels we have in progress we now have holiday gifting from the toddler locked down. Such a nice feeling.

Gifts from the Heart: Smooth Baking Soda Ornaments (A homemade alternative to going to the ceramics studio)- Go Running, Mama!

Baking Soda Clay

Ingredients:

  • 2 cups baking soda
  • 1 cup cornstarch
  • 1 1/3 cups cold water
  • 1 tbs cooking oil (I use olive or grapeseed since we don’t keep canola or mixed vegetable oil in the house)

Directions:  Whisk baking soda and cornstarch together in a medium sized saucepan.  Add liquids together and slowly whisk into dry ingredients.

Place saucepan on a burner at med/med-high heat and stir frequently with a silicone spoon/spatula.  Mixture will boil and then begin form clumps- once you see the first bubbles reach the surface of the mixture, move from stirring frequently to constantly, scraping the bottom of the pan as you go.  Mixture will soon form a thick mass that holds its shape and will be the consistency of slightly dry mashed potatoes.

Turn mixture out into a glass bowl and cover with a damp kitchen towel to cool slightly.  Once cool to the touch, turn out onto parchment and knead until very smooth.

Preheat oven to 175 degrees F.

On parchment lightly dusted with cornstarch, roll out dough to a thickness between 1/4- 1/2 inch.  Less than 1/4 inch thick will cause cracking and breakage during the drying process.

Cut dough into desired shapes.  Transfer to parchment lined baking sheet.

Bake in oven for 90 minutes, rotate sheet and flip ornaments, and return to oven for 30 minutes more.

Once dry and cool paint, decorate, and varnish as desired. If painting a more detailed design, brush ornaments with a damp sponge before painting to allow better paint manipulation as paint adsorbs quickly.

Exhaustion, Smoothie Pick-Me-Ups, and a Virtual Half Marathon Comedy of Errors

13 Sep Go Running, Mama!: Exhaustion, Smoothie Pick-Me-Ups, and a Virtual Half Marathon Comedy of Errors

I count myself to be a pretty lucky girl- things, for the most part, are normally going my way. I’ve got a fabulous family, I get to stay home with my daughter, and despite minor bumps or buggies we are all in great health and spirits! No real complaints… but his summer has done it’s part to throw me a few curveballs.

I launched into the summer feeling like I was on track to being in the best shape of my life. Sure sometimes I was tired, but I chalked that up to being a dance-teaching, marathon-training, mother of a toddler. Life is never perfect…. but it was pretty close. But the summer had a few health blips lined up for me- melanoma… surgery… recovery… and returning to training in the dead heat of a Texas summer. Yikes!

When I was able to lace up my running shoes again post surgery I was tired. Really tired. I looked forward to our trip to Breckenridge because I knew, just knew, everything would be fine when I got away from the heat. I’d been planning a 30+ mile run from Breck to Frisco and back for a good six months and I was already afraid I would have to cut the miles back just a bit since surgery had messed things up but I was sure I would still be able to pack in at least five slow pace, high mileage runs with no problem.

And despite having ease back into running for a month before our Breckenridge vacation, I still struggled through every high altitude run in the mild weather far more than I knew should be normal for me. The longest run I managed was 14 miles. That’s it. A measly 14 miles. And it was a debacle (those details are coming below, for the dedicate reader).

Something wasn’t right.

Go Running, Mama!: Exhaustion, Smoothie Pick-Me-Ups, and a Virtual Half Marathon Comedy of Errors

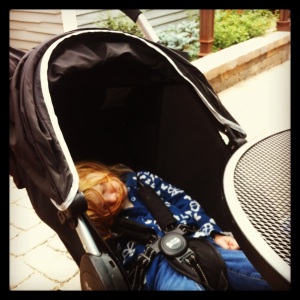
I get it kiddo. I’m tired too!

So I finally went to the doctor. He listened to me for a moment and said “You probably have mono.”

Mono? Pft… ridiculous! I’m a 33 year old mother of a toddler not a college student. He had to be wrong.

I plowed on through my additional symptoms and insisted that I had to have something to do with heat, or surgery, or anemia. Or- as I was deathly afraid in the depths of my soul- I just didn’t have enough energy naturally to handle all the things in my life that I love investing time and energy in and I just couldn’t hack it as the wonder mom I aspire to be each day. ‘Please don’t tell me that I’m just overextended and can’t handle it!’

He listened patiently and kindly and ran blood tests… including one for Epstein-Barr (mono).

Because, as it turns out, I have mono (and a severe Vitamin D deficiency which is as ironically humorous as vitamin deficiencies and skin cancer can be when paired with my Melanoma journey this summer). I’ve had it long enough that I’m no longer contagious. After careful consideration, he also decided that if maintaining activity kept me sane and didn’t make me feel worse that there was no reason for me to mope about the house waiting to feel like myself again.

Finding out I had mono had a profound effect on my well being. Finally there was a reason. I was simultaneously more tired after giving myself permission to be “sick” and unbelievably relieved and energized knowing that there was a reason for the madness. I can handle my “normal” life.

For a moment things just aren’t going to be my usual brand of “normal.”

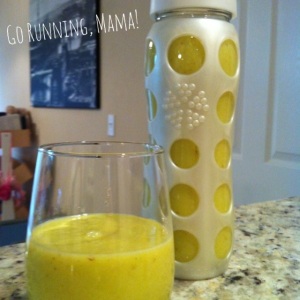
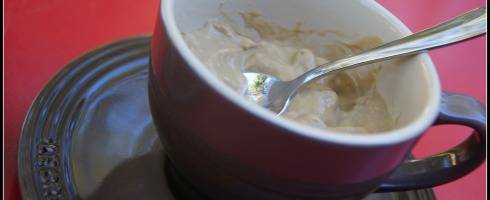
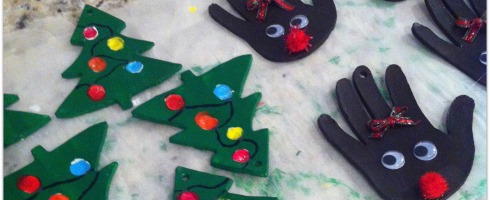
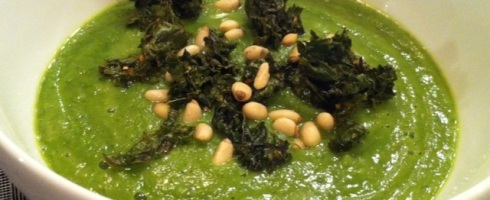
I immediately invested myself in finding ways to up my energy nutritionally and have found two smoothies/juices that are helping me power through: mango avocado smoothie juice, and an almond cacao smoothie.

The mango avocado concoction in loaded with mangoes whose high antioxidant vitamin content help protect against oxidative cell damage and support the liver as it neutralizes and removes toxins from your body. Cucumbers contain the minerals sulfur and silicon that help support kidney and liver function as well as potassium that supports healthy fluid balance. Apples are high in pectin which binds to toxins and helps eliminate them from the body as well as provides malic acid which is used by cells for energy production. Avocados are rich in healthy fats, packed with antioxidant vitamins to guard cellular functions, and high in B vitamins that provide adrenal support during times of stress.

The Almond Cacao Smoothie is filled with raw cacao which contains higher antioxidant levels than most fruits and vegetables as well as high levels of magnesium which assists muscle function and relaxation not to mention the amino acid tryptophan which helps to improve your mood. Wheat germ provides protein, B vitamins, vitamin E, and is rich in minerals. Almond butter provides a respectable dose of zinc which is an essential nutrient for healthy immune systems along with protein. Hemp provides omega fatty acids.

I’ve been whipping up a pitcher of one or the other each morning to help pull me through while my energy level is still on the low side.

Go Running, Mama!: Mango Avocado Smoothie Juice

Mango Avocado Smoothie Juice

  • 2 apples
  • 2 celery stalks
  • 1 large cucumber
  • 1 mango
  • 1/2 an avocado
  • 1 generous tsp flaxmeal
  • 1 tbs grade B maple syrup

Directions: Juice apples, celery, and cucumber.

Add juice to a blender with mango, avocado, flaxmeal, and grade B maple syrup and blend until smooth and well incorporated.

Makes four servings.

Go Running, Mama!: Almond Cacao Smoothie- dairy and soy free

Almond Cacao Smoothie

  • 2 c original hemp milk
  • 2 bananas
  • 2 tbs raw almond butter
  • 1 tbs raw cacao powder
  • 1/2 tsp vanilla
  • 1/4 tsp cinnamon
  • 2 tbs grad B maple syrup
  • 1 tsp wheat germ

Directions: Blend ingredients in a blender and serve cold.

Makes four servings.

Knowing that there as a reason for my exhaustion allowed me to finally forgive myself for the comedy of errors that was my virtual half marathon. The folks at Jost Running have been kind enough to allow me to run their virtual races complimentary for three months and I was exceptionally excited to run the August Virtual Half at high altitude while I was in Breckenridge. Truly I had wanted to do the virtual full as part of my planned 30+ miler I was so hoping to complete before my summer showed me it had other plans, but when I started to level with myself about what was physically feasible while still enjoying a relaxing vacation- the super long runs just had to go!

I’ve finally hit the point in my relationship where a 13 mile training run “isn’t a big deal” so 13.1 miles at a slow steady pace at high altitude didn’t seem like a massive undertaking in theory. It seemed routine enough in my mind that I made the simplest, yet most critical error imaginable in under-planning for my run. It was the morning that the USA Pro Cycling Challenge was set to leave Breck for Steamboat, so the hubs had left very early for a rafting trip so that he wasn’t delayed by road blockages and had taken a key to the house. Grandma and I were left with one key and a toddler who, once dressed and ready, needed to get out of the house for a walk and outdoor play IMMEDIATELY. Since I knew that I’d be gone for two hours and change- slightly longer than Baby Bird’s morning playtime- I suggested that they take the key and we all started out the door together… locking the door behind us.

It only took me a quarter mile to realize I forgot to bring water, so I quickly circled back to the house… that was locked. I did a few loops looking for Grandma and Baby Bird on their walk with no luck but didn’t want to waste too much time because I didn’t know how USA Pro Challenge closures might affect me coming back into town if I delayed my run too long. Plus, its was only 13.1 miles….

Less than two miles in my legs already felt like lead as had become the tradition in my runs over the past few weeks (Of course, I had know idea that I had mono!) which was insanely frustrating since I was maintaining a slow, even pace. Trying to focus on anything besides my heavy legs, I let my mind drift to the fact that…. I was a little thirsty.

Wait… No. Don’t think about that. Plus, the Fire Department always has a water station on the trail four miles out.

Just as I remembered, the Fire Station had water jugs set out for runners on the Summit County Rec Trail just past four miles. And they were empty. And I was tired. I assured my inner genius I should stay committed to this debacle by convincing myself that I could hold out and push slightly beyond where I had planned to turn around until mile 7 on the trail that passed by the high school athletics field- surely there would be a water fountain out there!

Mile seven was an enlightening one. I learned that, in fact, there is not a water fountain available to the public at the sports field. And I remembered that using that as my turn around point meant that the return seven would be uphill. Now, if I’d turned around half a mile early it still would have been up hill… but it would have been at least a half mile less of uphill at 9,000+ feet without any water.

I paused my watch to think.

Herein lies the true beauty of this being a virtual race- had it been a normal race this is where I would have decided to admit personal defeat for the first time and thrown in the towel (of course… they would have had water at every mile so I would have felt less defeated, but that’s beside the point) but as it was it was the only person I was currently beholden to was myself and I needed a second to think.

I paused my watch.

Time needed to stop for a moment. This run was simply me against me… me with me… and my personal course rules that day allowed me to recollect myself before pressing forward. I needed to think for a moment about why I run.

Go Running, Mama!: Exhaustion, Smoothie Pick-Me-Ups, and a Virtual Half Marathon Comedy of Errors

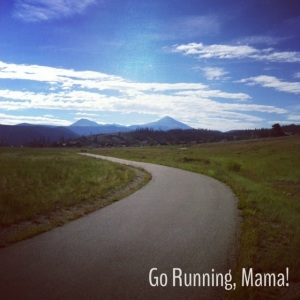
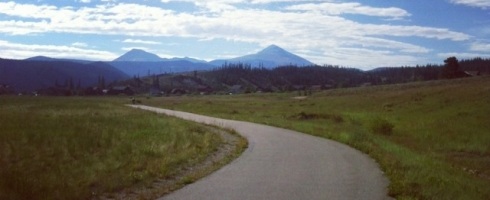
I thought about my inspiring husband, my beautiful baby girl, and the community or runners I have met. I thought about my health- beyond the exhaustion- and happiness. I looked around me at the mountains and back at the path that was appearing deceptively flat, I took a deep breathe, snapped a quick photo of the moment that kept me going, and clicked my watch back on- it was time for life to keep moving.

The beauty of my surroundings and my own internal drive kept me moving for the next three miles until reality in the form of dehydration, altitude, and undiagnosed mono kicked me in the gut and my slow pace went to sloooooow pace. I planned to ask the next cyclist who would pay attention to me on the trail if they had extra water, but everyone was in a major hurry to get into Breckenridge to watch the USA Pro cyclists head to Steamboat. I was closer to a jog by the time I passed a little furniture shop that apparently normally has water setup for runner but didn’t on that day. I must have looked pretty defeated at the time, because the sweet owner was outside and asked me if I needed to come in for a drink.

Pause.

That’s when the exhaustion really caught up with me. All I could think about was how tired I was and, as I stepped back outside, I noticed that on the main road there was a bus stop.

And I stopped my watch.

I decided to throw in the towel.

I sat down at the bus stop and waited, trying not to think about the fact that I had quit.

I waited.

And waited.

And waited.

And finally figured out that busses wouldn’t be running until USA Pro Challenge had completely exited Breck.

I was four miles from home. I couldn’t call anyone to get me because the roads were closed.

I had two choices- run or walk.

I chose run.

I looked down at my watch and noted the time but left it off. These last four miles weren’t going to be about pace… they were going to be about me and my state of mind. Despite the fact that my footwear choice for the day was road running shoes, I decided skip off the rec trail and run the path along Blue River on the was back- if it was going to just be about me, I wanted it to be as scenic as possible.

Go Running, Mama!: Exhaustion, Smoothie Pick-Me-Ups, and a Virtual Half Marathon Comedy of Errors

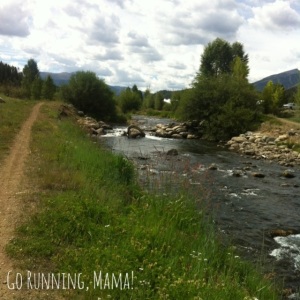
Ironically, this became the best part of my run- pace wise and peace of mind wise. Focusing on the trail took my focus off of the rest of my struggles that day. I ended on my own terms and smiling… mentally.

In the end, it took me 2 hours and 22 minutes of running time to make it from our house to the high school back to Main Street- about 14 miles in distance. I’m glad I gave myself the flexibility and freedom that day to focus on what I did instead of getting caught up in the moments where I was doing nothing.

And I learned first hand how important it is to be properly prepared for every run.

And I took a really good nap.

Kale and Cauliflower Soup with Crispy Kale Chips and Pine Nuts

10 Sep Go Running, Mama!: Kale Cauliflower Soup with Pine Nuts

There are three publications I wait for with bated breath- Martha Stewart Living, Nutrition Action Healthletter, and each and every Williams Sonoma catalogue. And, although the first two are completely amazing, my favorite is probably the Williams Sonoma Catalogue. There’s just something about paging through such a well curated and expertly styled selection of kitchen goods that is euphoria inducing. A hot bath, a quiet house, and a moment to daydream about how chic the agrarian trend of beekeeping could be? Oh Martha, wouldn’t you be proud of this stay-at-home-hot-mess if as I jarred my own honey and wrapped each one in a washcloth I knit with the Purl Soho kit and tied them off with a homemade Lifestyle Crafts letterpress tag. But alas… handicraft hobbies are pricey and Baby Bird’s schooling can’t be paid for in macrame tchotchkes, so those ambitious daydreams will continue to live tantalizingly on the pages of each William Sonoma book of temptation.

A few weeks ago we had a mail day that produced the trifecta- Martha, Nutrition, and WS… Hooray! After Baby Bird’s bedtime, I cozied into bed to scheme about what I can’t wait to make (Plums with Sparkling Wine, Black Pepper, and Tarragon), what steps I need to take to improve my health (looking over the US nutrition report card made me glad the plums topped my “to be cooked” list instead of the beautiful flourless chocolate espresso cake), and what kitchen goodie I’d love to get my hands on (obviously, I could be creating far superior pizzas if I had a pizza peel). As I devoured the pages of the WS catalogue, tucked onto a page with the new VitaMix blenders that are short and squat enough to fit under the cabinet on the countertop (right after I have a special pull out drawer made for my VitaMix during our kitchen remodel no less) was a recipe for Kale and Cauliflower Soup.

I’m a sucker for a nutritious, healthful soup and an absolute kale nut so it was immediately bumped above all the recipes from the September issue of Living on my “must Make” list. I made a few adjustments to suit our tastes at home- I eliminated the celery and doubled the kale along with cutting back on the vegetable stock to create a thicker soup. I also opted to season my kale chips with blood orange pepper- my newest spice obsession.

It was easy, yummy and nourishing. This is one we will definitely be revisiting as we start into Autumn and dream of crisp weather that we will never see here in Austin.

Go Running, Mama!: Kale Cauliflower Soup with Pine Nuts

Kale Cauliflower Soup with Crispy Kale Chips and Pine Nuts

  • 1 large head of cauliflower, cut into florets
  • 2 bunches curly kale, stems removed, leaves chopped, keeping each bunch separate
  • 1 yellow onion, diced
  • 3 garlic cloves, finely minced
  • 4 c vegetable stock
  • 1 c water
  • 1/3 c pine nuts
  • olive oil
  • butcher cut pepper
  • Maldon sea salt
  • blood orange pepper

Directions: Preheat over to 450 degrees F.

Toss cauliflower florets with 2 tbs olive oil and season with salt and pepper. Spread on a baking sheet and roast, stirring occasionally. Roast 20-25 minutes, until edges are golden and crisp.

Reduce oven to 300 degrees F.

Toss one bunch of kale with 1 tbs olive oil and season with salt and blood orange pepper. Arrange in a single layer on baking sheet. Roast, rotating half way through and stirring several times, for about 25-30 minutes until kale is crisp.

Meanwhile, in a stock pot over medium heat, saute the onion in 2 tbs olive oil until tender. Add garlic and cook, stirring constantly, for 1 minute. Season with salt and pepper. Add the cauliflower and broth and increase heat to medium-high to simmer.  Cover, reduce to medium-low and cook 10 minutes.  Stir in the remaining bunch of kale, increase heat to medium and cook uncovered for 10 minutes.

Puree soup in blender or using an immersion blender.  Top bowls of soup with kale chips and pine nuts.  Add kale chips immediately before serving as they will lose crispness once in the soup.

Get to Know Your Grains: Quinoa (Cinnamon Quinoa Lunchbox Bars)

12 Aug Go Running, Mama!- Cinnamon Quinoa Lunchbox Bars; clean, healthy snack or breakfast on the go

About eight years ago I was exposed to quinoa at Walt Disney World while staying at Animal Kingdom Lodge.  Boma, the African buffet restaurant on property, served a hot quinoa breakfast porridge every morning and even without knowing its nutritional prowress I found it to be a delightfully tasty alternative to normal breakfast cereals.  I knew I just had to have it as a morning meal option in my own home.  Anyone who has been to WDW knows that they do customer service right so when I asked about how it was prepared, the chef provided me with the preparation method and recipe.

When I returned home, I did a little research on this mystery grain and quickly learned that it was quite the super grain.  Along with preparing quinoa in the mornings I started seeking out other ways to enjoy it.  At that point I was living in Houston and the fabulous Monica Pop would sell a red quinoa salad (that I have often tried to copy, yet have never managed to get quite right) at the T’afia farmers market that became a common staple for me.  I also started making a quinoa and flax granola occasionally that- looking back- seemed very forward thinking despite the fact that my friends made fun of me for taking time to home make a seedy little granola.  It’s probably one of the biggest contributors to my crunchy hippie reputation amongst my NFL dance friends.

By now I think most everyone is familiar with quinoa and has used it at least once in their kitchen- even if it’s simply been in place of rice as a side dish.  And however you might use it, you’re doing your health some serious favors.  Nutritional evaluations of quinoa lead most dietitians to classify it as a complete protein.  It’s high in antioxidants, phytonutrients and the flavonoids quercetin and kaempherol- higher, in fact, than the celebrated cranberry.  It contains eight essential amino acids yet is low in fat.  It is gluten free.  It’s easy to prepare and store for midweek meals.  No wonder it’s considered the “Mother Grain.”

To be frank, practically the only way you can go wrong with quinoa is to pronounce it phonetically.  Stop with the “kwin-oh-uh”… it pronounced “Keen-wah.”

Say it with me- “Keeeeeen-waaaah.”

Now go eat some!

Nutritional Information (1/2 c prepared quinoa)-

  • Calories- 111
  • Total Fat- 4 g
  • Sodium- 7 mg
  • Carbohydrates- 19.5 g
  • Fiber- 2.5 g
  • Protein- 4 g
  • Vitamin E- .6 mg
  • Thiamin- .1 mg
  • Riboflavin- .1 mg
  • Niacin- .4 mg
  • Vitamin B6- .1 mg
  • Folate- 37.5 mcg
  • Calcium- 16 mg
  • Iron- 1.4 mg
  • Magnesium- 59 mg
  • Phosphorus- 140.5 mg
  • Zinc- 1 mg

Go Running, Mama!- Cinnamon Quinoa Lunchbox Bars; clean, healthy snack or breakfast on the go

These are perfect for my toddler’s snack during dance camp because they pack a protein punch!  If you’re making them for adults, up the flavor factor by tossing in some additional baking spices.  You can also toss in raisins to make them more similar to traditional granola bars for bigger kiddos.

Cinnamon Quinoa Lunchbox Bars

  • 2 1/2 c quinoa, prepared and at room temperature
  • 2 eggs
  • 2 tbs flax meal
  • 6 tbs water
  • 1/3 c almond milk (I’m crazy for Califia Farms)
  • 1/3 c grade B maple syrup
  • 1 tbs local honey
  • 1 tbs cinnamon (ceylon is the best bet for use in this quantity)
  • 1 tsp vanilla extract
  • pinch of salt

Directions: Preheat oven to 370 degrees F.

Line an 8×8 baking dish with parchment paper.

In a small mise en place bowl, mix flax meal with water and allow to congeal.

In a mixing bowl, whisk eggs and flax meal mixture.  Reserving quinoa, add remaining ingredients and whisk once again.

Add quinoa and mix well to combine.

Pour into parchment lined baking dish and bake for 25 minutes.

Allow to cool 10 minutes in pan before removing on parchment to a cooling rack.

Once completely cool, cut in  a 2 inch grid to create 16 bars.